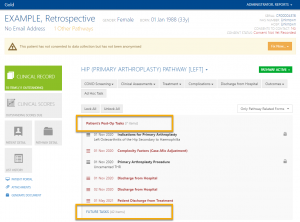
Form Colours Explained
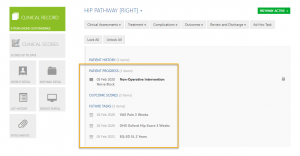
Within a patient record there are three colours a form could appear as.
Black – Completed forms.
Red – Incomplete forms.
Grey – Upcoming forms.
Changing a Complete Score to Outstanding
You may not have permissions to change form dates. If not please contact Amplitude Customer Support who can do this for you.
Find the patient and Click on the Pathway to bring up the patient record.
On the left of the form, click on the three lines and select Properties.
Change the status of the form to Incomplete and then click save.
The form will now show in red as incomplete.
How to Hide/View Future Tasks
Future forms appear as grey on the patient record. It is optional if you want to see these or not.
To change the settings first click Settings.
Click Profile.
Scroll to the bottom of the screen and toggle Show Future Dated Tasks on or off.
Then click save.
User Customisable Task Sets
Task Sets are customisable for each pathway type. They determine when and which tasks get sent out to patients on that pathway and how they are triggered e.g. triggered by completing a procedure form. Please Note: In general, you cannot edit registry owned pathways.
First click on the Settings icon.
Then select the Pathway for the task sets you’d like to amend.
Choose which category you would like to customise.
You will then see a table. Each row is a task and each column is a time interval.
Use the tick boxes to choose which tasks to go out and at what point along the patient pathway.
When you have finished click Save.
Creating Ad Hoc Tasks
You can add tasks for a patient to complete either in the future, now or retrospectively e.g. you have a paper copy and wish to enter when they completed it.
Search for the patient and click on the Pathway.
Then select Ad Hoc Tasks.
A lists of tasks will appear, select the one you require.
Fill out the relevant information, and select a Due Date – this will determine when the task will be sent to the patient.
The form will then appear within the patients Clinical Record.
How to Delete a Form
You may not have permissions to delete forms. If not please contact Amplitude Customer Support who can do this for you.
Find the patient and click on the required Pathway.
On the left hand side of the form, click on the three lines. The click Delete.
You will be prompted to confirm the deletion of this form. Once deleted, it will be removed from the patient Clinical Record.
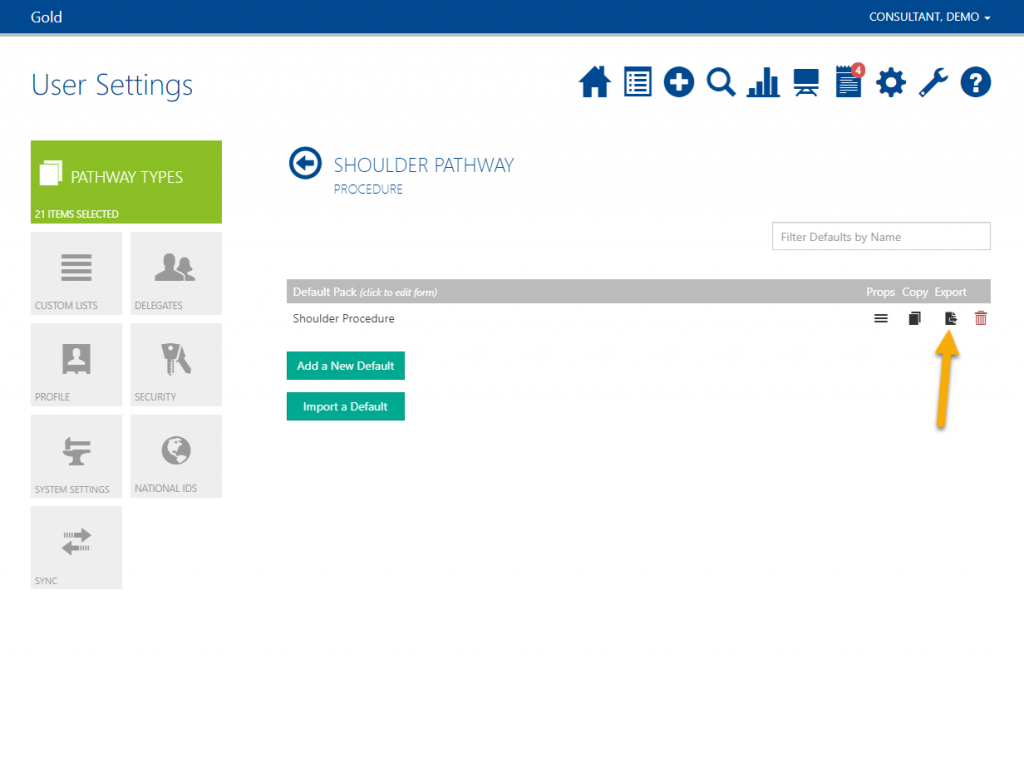
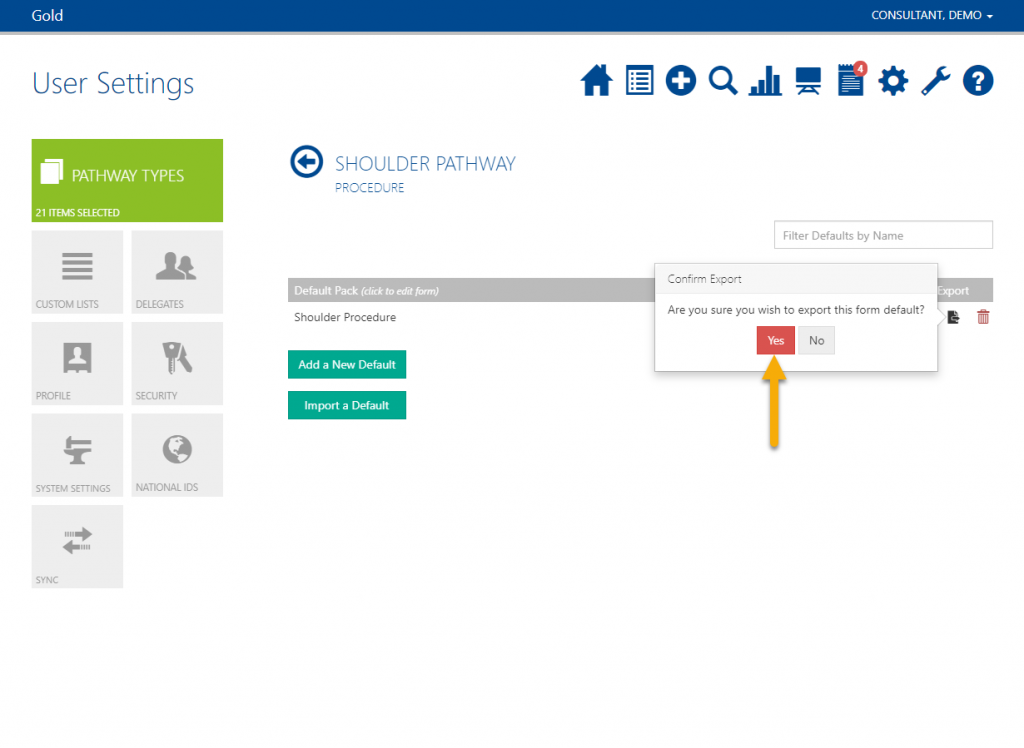
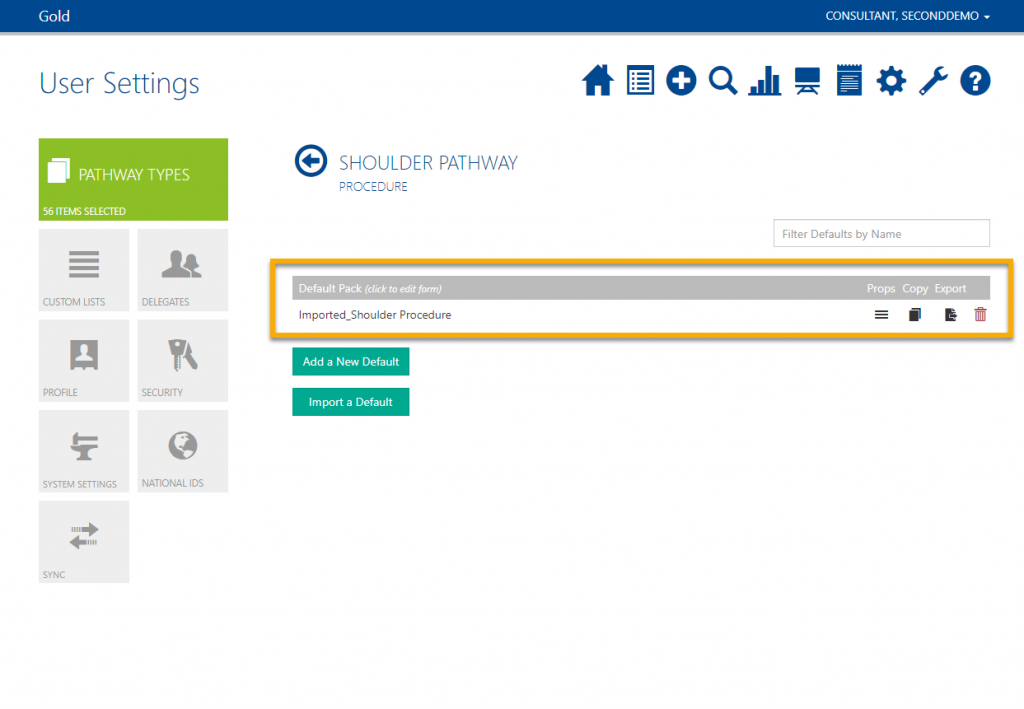
How to Export and Import Your Form Defaults
You can easily transfer form defaults to different users and from test to live
sites to allow groups of users to use the same default without the need to recreate it for each user. This is done using the Export/Import functionality.
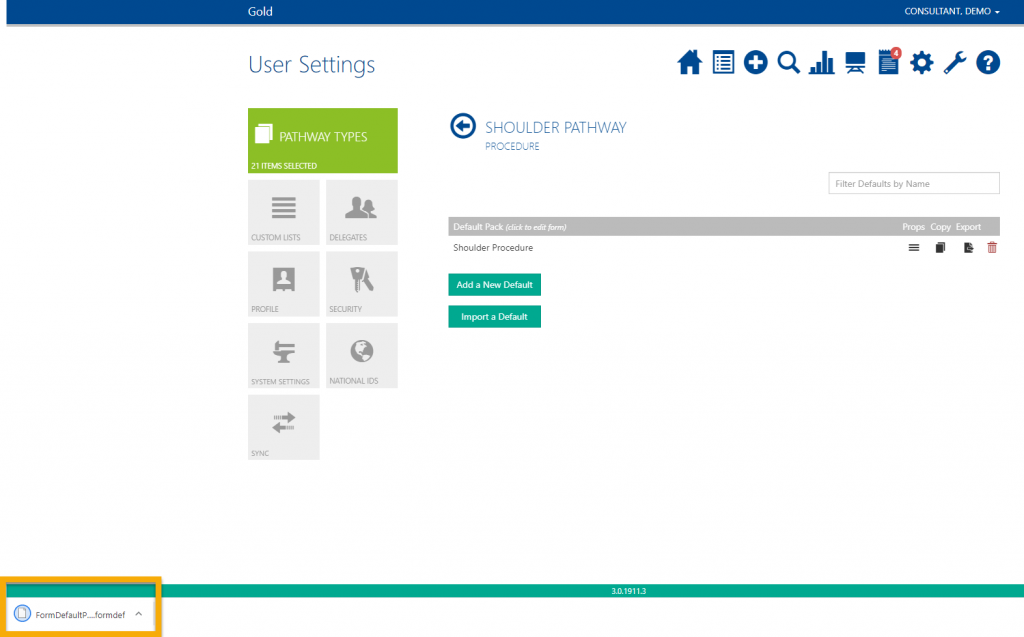
Depending on the browser you are using you may see the download at the bottom left corner of the screen.
You do not need to open this file.
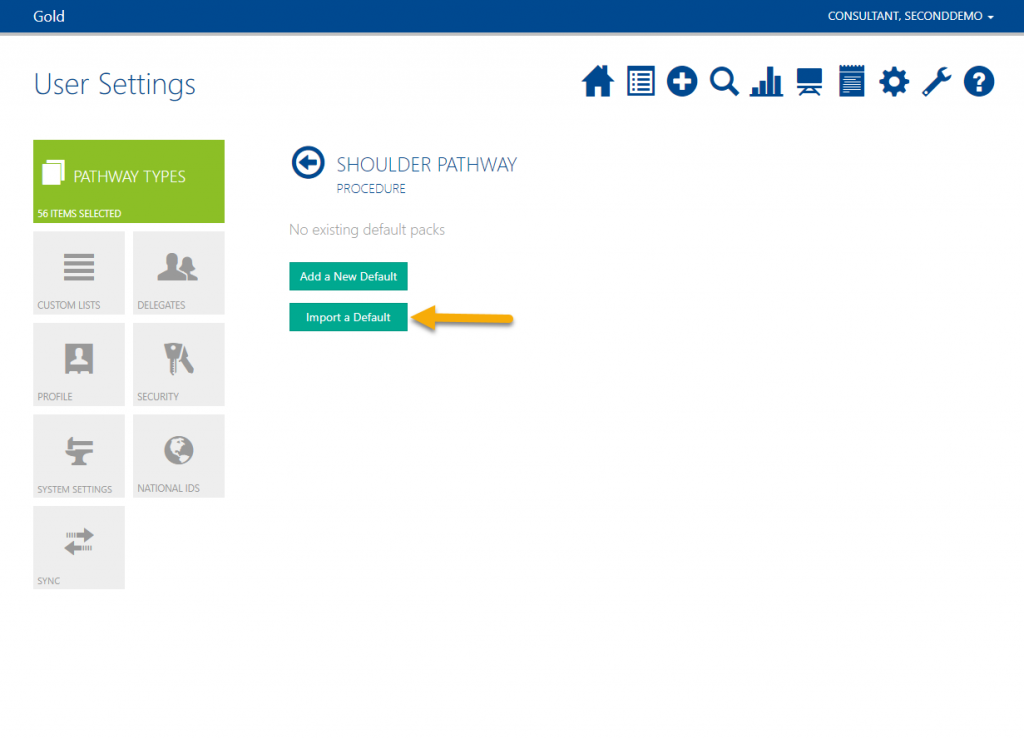
Now, find the destination site to import the default to. This may be another account of your own or another user who wishes to have the default.
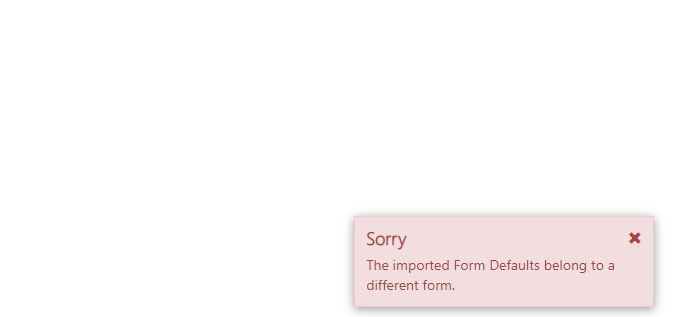
You must import to the same pathway and same form type that you exported from.
Click Import a Default.
This will open File Explorer. You can find the exported file in your downloads folder.
Select the file and click Open.
Trigger “One Off” Task Sets
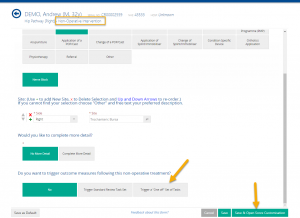
You can customise the tasks triggered after completing a Non-Operative Intervention on a patient by patient basis. This is done at the end of the Non-Operative Intervention form.
Complete the Non-Operative Intervention form for the required patient.
At the end of the form select ‘Trigger a “One off” Set of Tasks‘.
Click Save & Open Score Customisation.
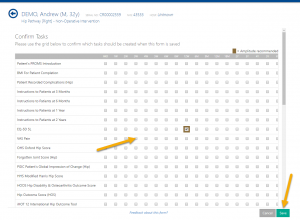
This will open a grid similar to what you see in Task Set Customisation for pathways.
Tick the boxes to choose which forms you’d like to trigger and when they should be due. For example, VAS Pain at 3 weeks.
Once complete, click Save.
How to Add Retrospective Data
Sometimes adding data retrospectively can feel complicated in a system that is designed for real-time use. This step-by-step guide should help when adding data in retrospect.
It is first useful to understand how the system notifies patients and the running order of actions on the database. When a record is added to the system and an email address is present in the record, during the night the system runs through all records and sees where there is a new task for a patient to complete. Once it finds this it then sends an email, or SMS, to the patient. The system then takes a backup and at the same time checks for any tasks that are no longer relevant e.g. a 6-month task is outstanding but the 12-month task is now due so it removes the 6-month task because it is no longer relevant. The following day when the patient receives the email, or SMS, they click the link to go to the portal and complete the tasks that are now due and relevant.
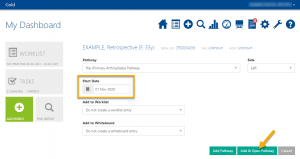
The first step is to add the patient and the pathway you want to add retrospective data to. When you are creating the pathway it is especially important to choose an appropriate start date. We would recommend this is the date of surgery or intervention.
In this example, the patient had hip surgery on 01/11/20 (7 months prior to the writing of this article). This pathway collects baseline, 6-month, 1-year, and 2-year scores. The pathway start date is marked as November 2020 as per the surgery date.
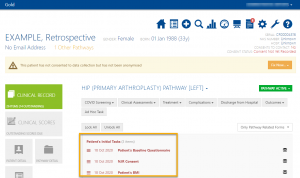
On selecting Add and Open Pathway you will see that it has created the baseline tasks that the patient should have filled out. They will be dated appropriately e.g., here they are dated as 18/10/20, 2 weeks prior to the pathway start date.
If you have historic data that you are manually going to input e.g. you collected paper baseline scores from this patient in October, you will need to input this data on the day you created the pathway otherwise the nightly cleanup process will delete the tasks. If this happens, however, all is not lost as you can still create an Ad Hoc Task for the forms you want to manually input. Ensure to label the form as baseline and change the completion date to when it was that you collected the paper scores.
If you did not collect paper scores at the time, and are only interested in collecting current and future scores, overnight the cleanup process will delete any scores no longer due and when the patient logs in the following day they will only be presented with the current set that is due for completion. Please note: we never delete baseline scores, so in this example they would be presented with the baseline and the 6-month scores to fill out. Therefore, if you do not want the patient to fill out baseline scores, simply manually delete them by clicking the three lines next to the form.
If you want the patient to complete the scores on the same day you add them, rather than waiting overnight, you can do this by clicking the Send Email button. However, you will need to review the due tasks and manually delete any that are not relevant as clearly the overnight deletion process will not have had a chance to run.
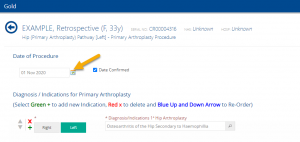
Now you need to add the retrospective data. In this case we are adding a procedure form for 01/11/20. Ensure you choose the correct date at the top of the form as this will default to today’s date.
When you have saved this form, you will likely see some future tasks as well as due tasks, but this will depend on the dates you are working with.
They will all have due dates that are relevant to the procedure date – not today’s date.
As with the baseline scores, you have three main options:
1. Wait for the overnight service to remove any irrelevant tasks and automatically send the patient those that are currently due and relevant.
2. If you have collected the scores on paper, you can input that data now.
3. Cleanup any unwanted/outdated tasks and send an email to the patient now.
The patient will be notified of future tasks when they become due for completion.
Click below to download the help pages in PDF format:
Changing a Complete Score to Outstanding
How to Hide or View Future Tasks

