Clear Auto-fill Data
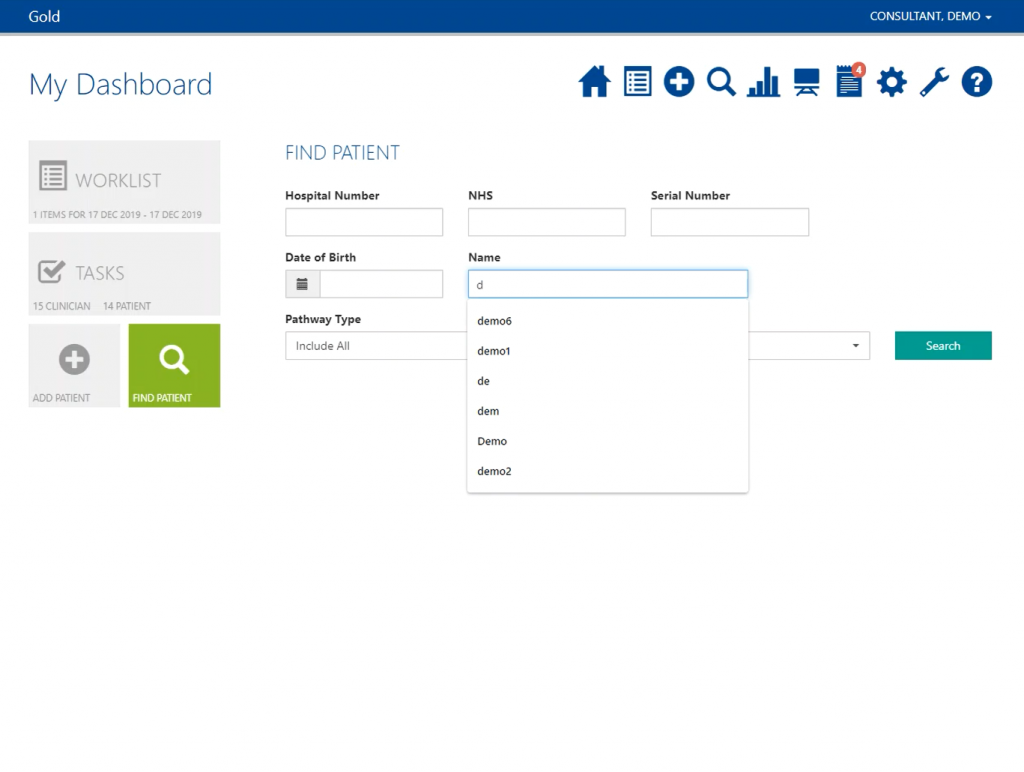
Most of the web browsers can remember what you’ve entered in forms on web pages, also known as text fields. After you’ve entered data into a form on a web page (such as a search box), the next time you visit that page, your previous entry will be available to re-use. These may appear on most text fields like Patient details, names of procedures or names of forms. However some Amplitude users find that as a difficulty. This article will show you how to clear the pre-populated text.
This guide will show you how to clear auto-fill data in Chrome however other web browsers will be similar.
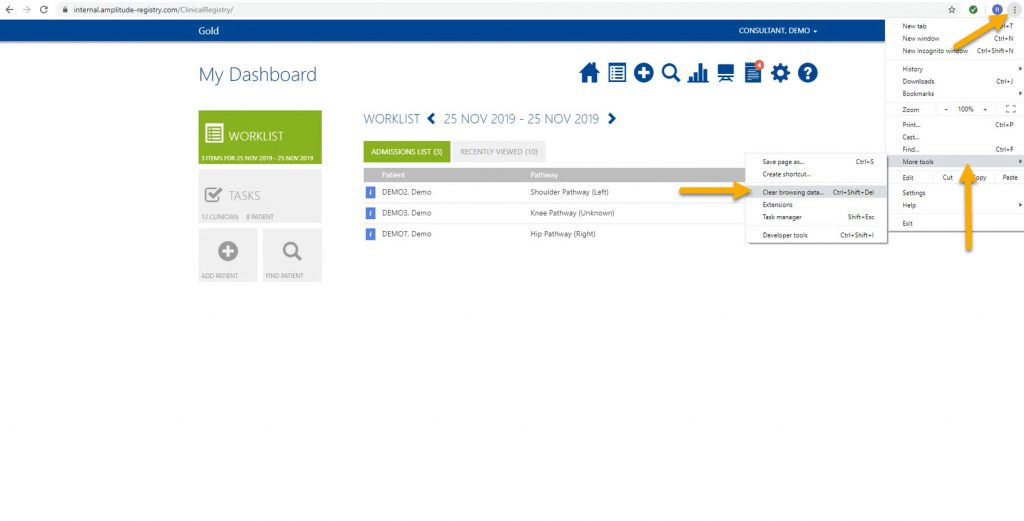
First, click the three little dots at the top right of the screen.
Hover over ‘More Tools‘ and click ‘Clear browsing data… ‘.
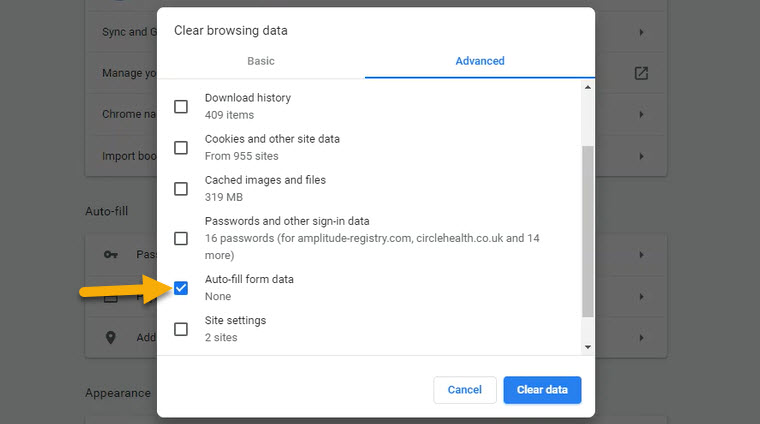
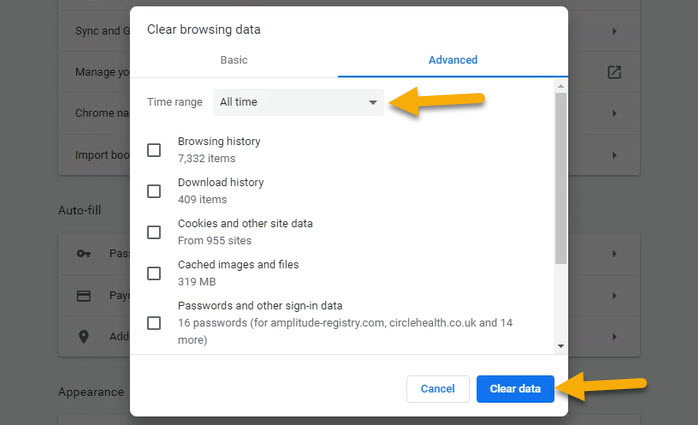
Choose the Time Range you want to clear over, then click ‘Clear data‘.
Auto-fill data will now be cleared.
Why is my Operation Note Printout Different?
When printing, an operation note it can occasionally print in a lighter colour format then one shown on your computer screen, causing difficulty in reading it clearly.
Please check the following before printing:
- Use a different web browser with a default HTML style sheet in it. For example, Chrome, Firefox or updated version of internet explorer. Specific web browser setting will override any other settings
- Running the chosen printer in eco mode – A user can control the printer setting in their browser choice settings.
The following guide will show you how to change printer settings in Chrome.
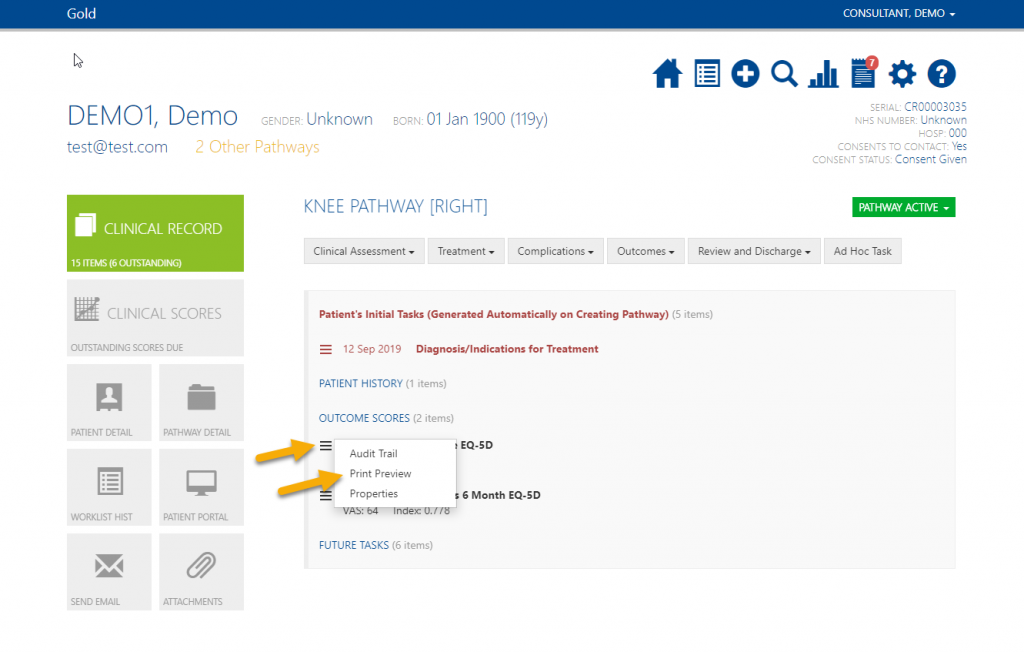
Click on the three lines to the left of the procedure form (or the form you would like to print).
Click ‘Print Preview’.
Click the drop down arrow next to the printer destination to change the printer preference or click More settings to change the print quality
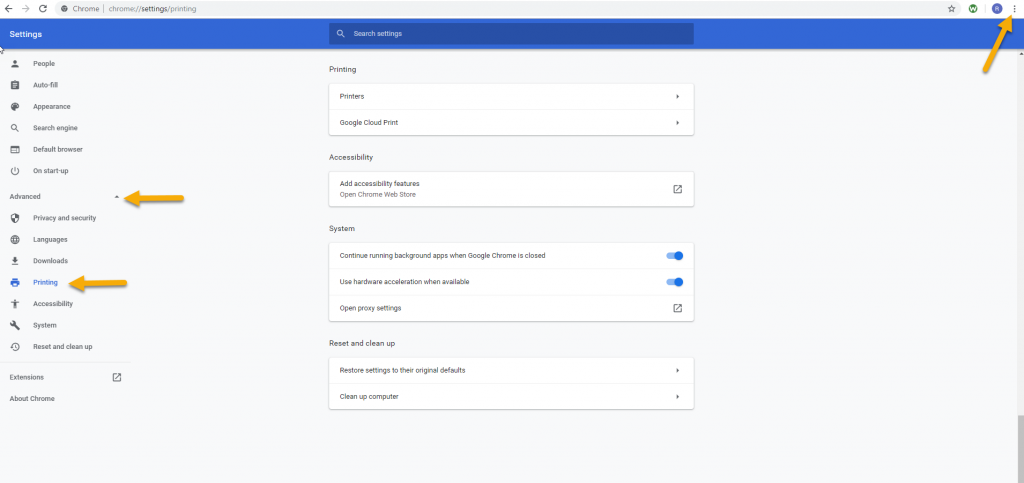
To manage printer settings using the web browser click the three little dots at the top right of the web page.
Drop down Advanced and click Printing.
Here you can manage printing preferences.
Why Won’t my Operation Note Print?
A common reason why an operation note will not load in print preview is due to it being blocked by the web browser settings. This help page will show you how to solve this in Internet Explorer however other web browsers will be similar.
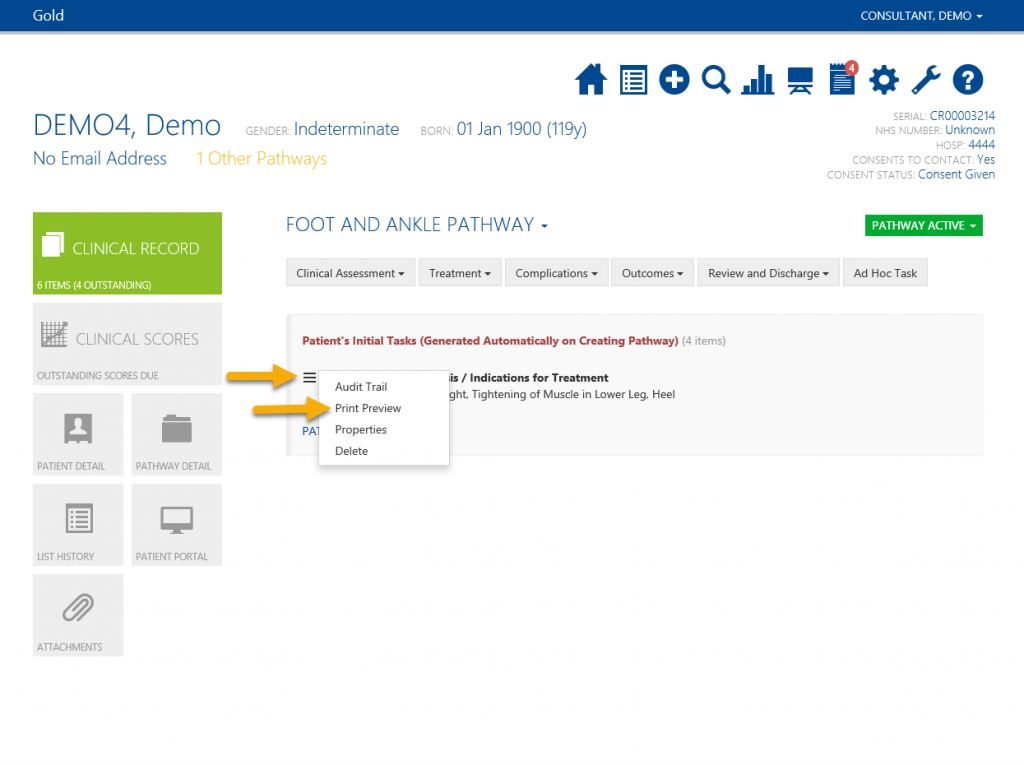
Click on the three lines to the left of the procedure form (or the form you would like to print).
Click ‘Print Preview’.
To resolve this in Internet Explorer:
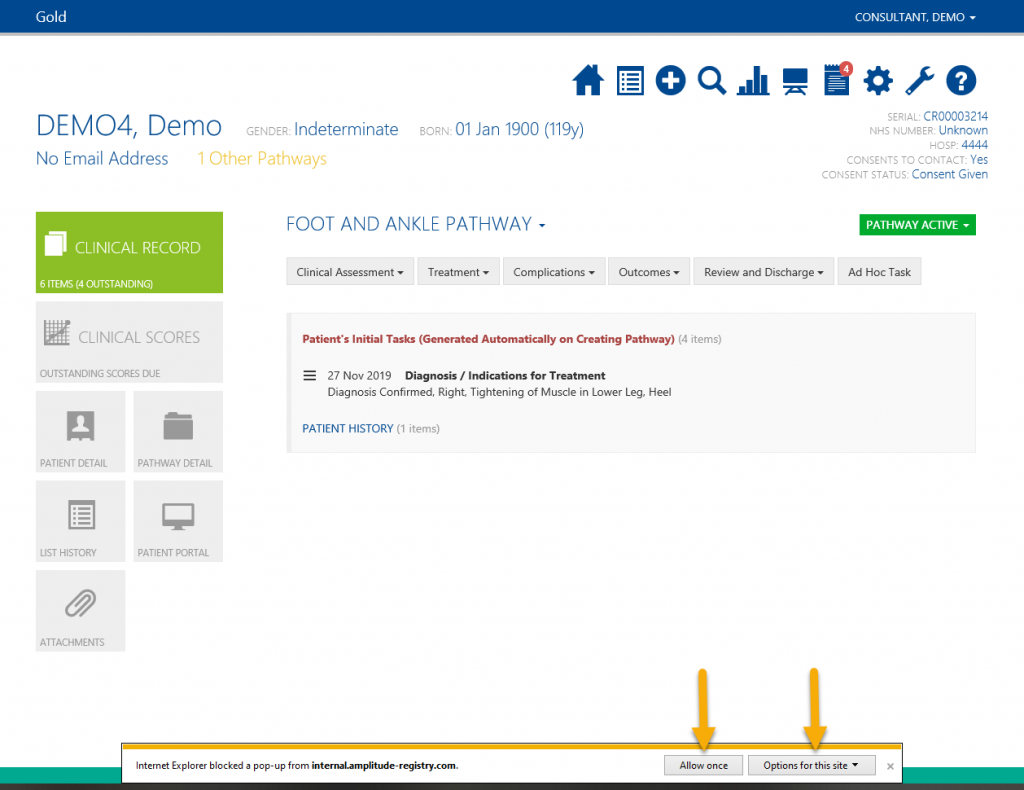
If the pop-up is being blocked you will see a yellow bar appear at the bottom of the page.
Click ‘Allow once‘ if you would like this occasion to be an exception or click ‘Options for this site‘ and then ‘Always allow‘ to always allow pop-ups for Amplitude.
Next time you click Print Preview, this will load the print preview screen.
How to Run Two Factor Authentication?
To increase security we use two factor authentication to hinder unwanted access to your account. The following are instructions to help users through the process of enabling Multi/Two Factor Authentication on your mobile device.
For Android For Apple OS For Windows

Choose a mobile device that you want to run your authentication app on then find the app store on your given device.
On either of these app stores you will be able to download either of the following Two Factor Authenticators.

Download the authenticator app you would like to use. The most commonly used one is Google Authenticator but you can use any of these listed below:
Google Authenticator
Microsoft Authenticator
Duo Mobile
Authy
LastPass Authenticator
Authentication Activation
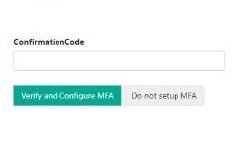
Once downloaded, login as you would normally to the registry. You will now be presented with a two-factor authenticator screen that looks like this.
You will now need to scan the QR code. Point your mobile device’s camera at the QR code while inside the authenticator app or type in the Key above the pixel image, add the account when prompted in your authenticator app.
This will give you a code. A BLUE code is usable, while a RED code will require you to wait a couple of seconds for a new code to generate, the new code will appear BLUE.
Select the Verify and Configure Multi Factor Authentication (MFA).
WARNING: If you choose “Do not setup Multi Factor Authentication (MFA)” this will close the registry and you will not be able to login.
What do I do if have no access to a smart phone device?
If you do not have access to a smart phone or you would prefer to use a Windows Desktop or Mac personal computer, do not worry, the following will guide you in setting up Multi/Two Factor Authentication.
The most commonly used one is Authenticator.cc but you can use any of these listed below:
For Windows:
For Mac:
After following the installation process for the above Multi/Two Factor Authenticators for desktop devices please go back and follow the guide starting at the Authentication Activation section.
Click below to download the help pages in PDF format:
Why is my Operation Note Printout Different

