Your Dashboard Explained
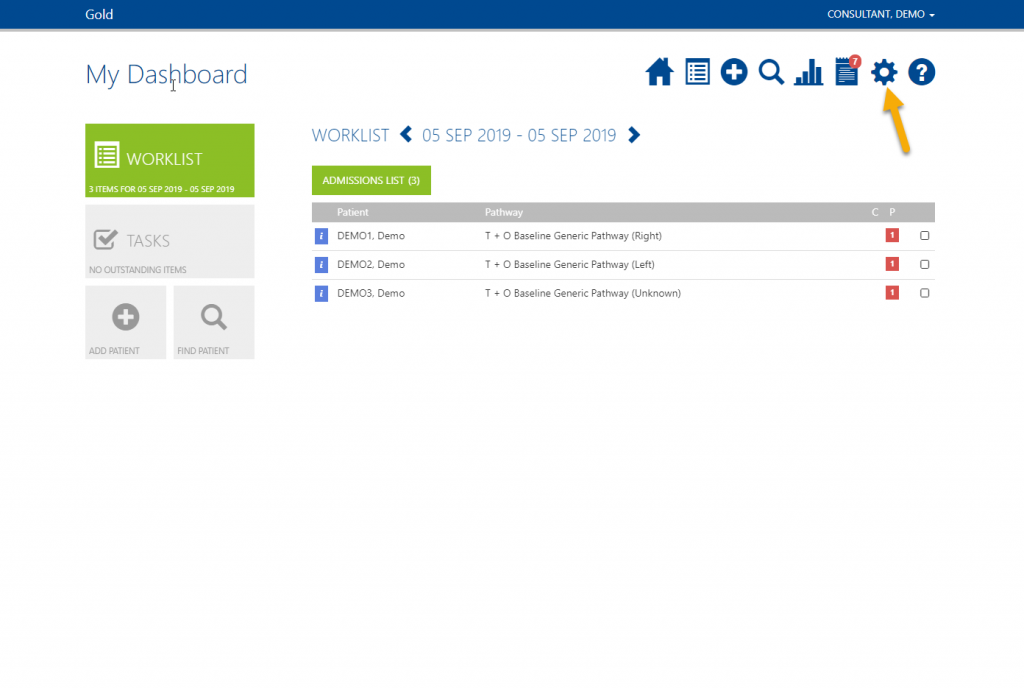
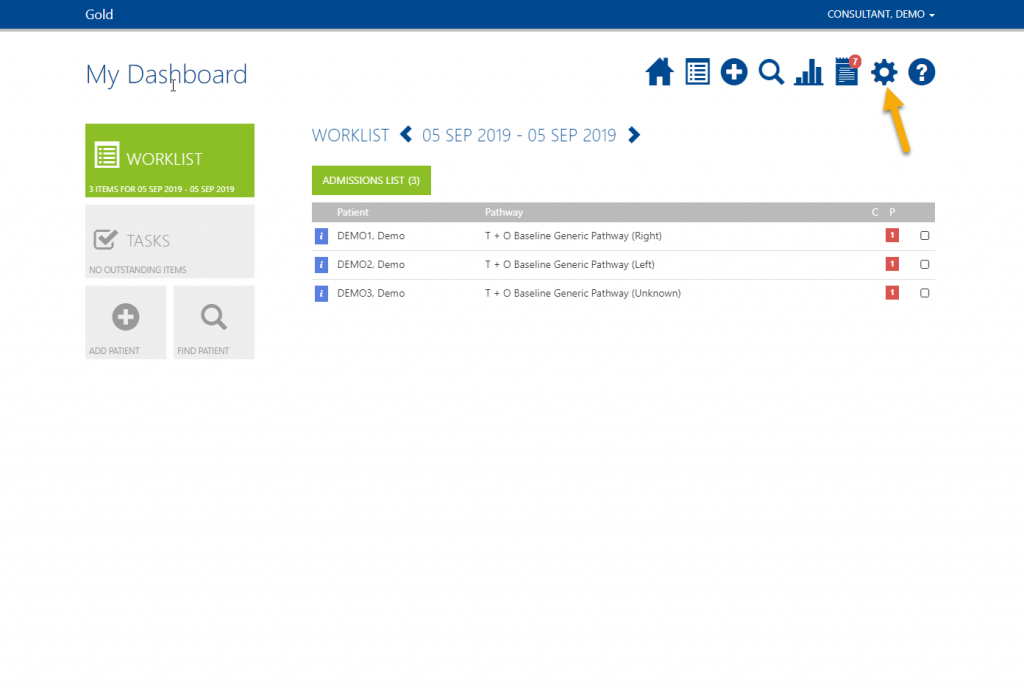
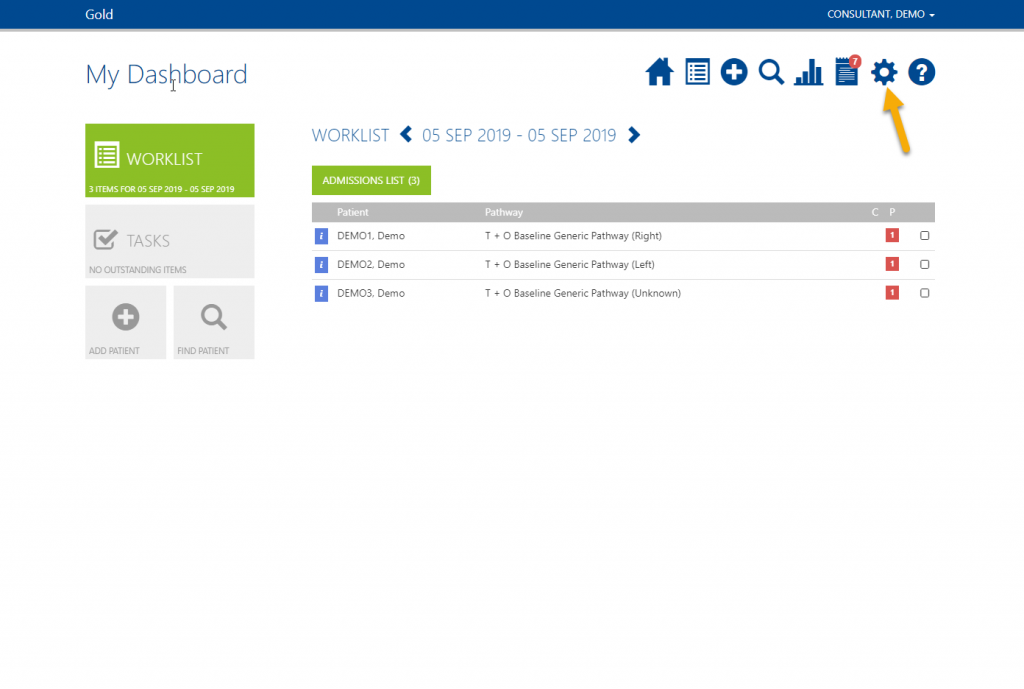
Your Dashboard is the first screen you see after logging in – the Home icon will always take you back to this screen.

This is your Worklist, it contains a short list of patients admitted that day – these may be new or follow ups. You do not need to use this to collect outcomes, it is available for your convenience.
The Tasks button will take you to a list of all the tasks you and your patients have outstanding.
The plus icon will take you to a page where you can add patients directly to Amplitude. This is in two places on your Dashboard.
The magnifying glass will take you to the Find Patient screen where you can search for any existing patients. This is in two places on your Dashboard.

The list icon will show you a quick overview of your Worklist for that day.

The bar chart icon will take you to Report Writer. Here you can run pre-defined reports or create your own.

The board icon will take you to your Whiteboards. These are customisable boards to help you manage your patients. You do not need to use these to collect outcomes, it is available for your convenience.

The page icon takes you to your System Notices, here there will be notifications such as information about upcoming site upgrades and downtime.

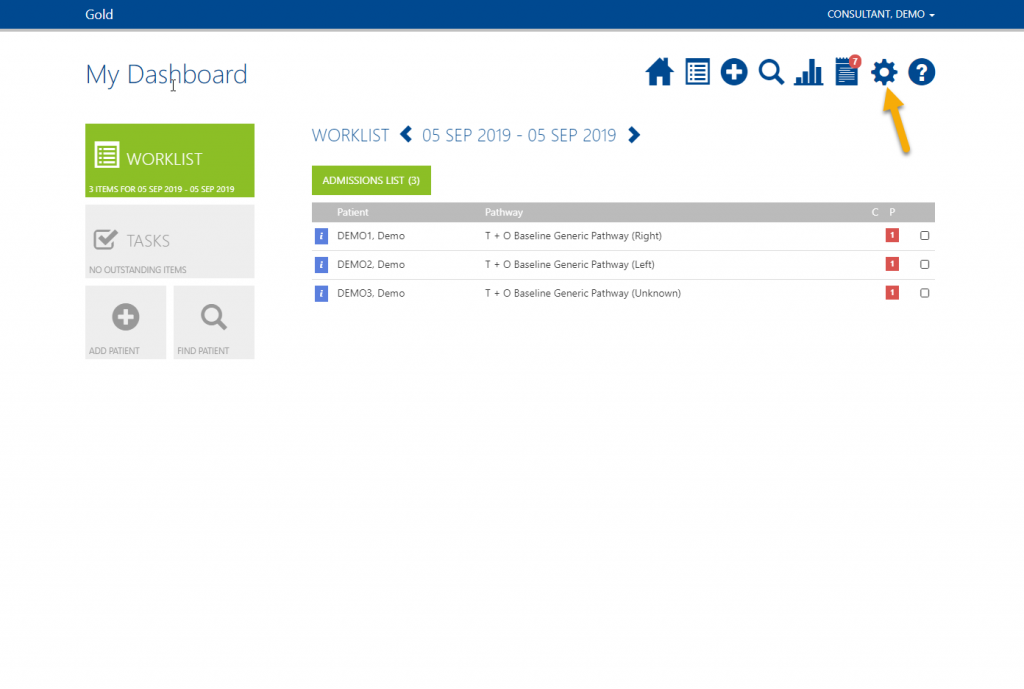
The cog icon takes you to your Settings which will allow you to customise your Amplitude account.

The question mark directs you to our Knowledge Base web page where you can find help pages for using Amplitude.


At the top right-hand side, if you are a consultant you will see your name. If you are a delegate you will see your name and in brackets the consultant you are currently delegating for.
Your Compliance Reports Page
Your Compliance Reports Page is a snapshot view of your patient compliance for consent, form completion and email addresses – the scale icon will always take you back to this screen.

This is your Compliance, it is shown as pie charts that are separated into Has Email Address, Consent to Contact, and Contact Type. Each pie chart is broken down into the respective colour fields listed underneath each pie chart.

Filters allow you to see data more specified to your situation.

If you require information on how Compliance is calculated you can view this at the bottom half of the screen for more details.

The Users drop down menu will show all available clinicians you delegate for. Clicking on a delegate’s name from the list will display the compliance for that delegate’s patients.

The Charts Button allows you to see the pie charts of the selected data for that user.

The Overdue Tasks Button shows the selected user’s overdue tasks in latest date order.

The Due Tasks Button shows all currently due tasks for the selected user’s tasks in earliest date order.
How to Add a Delegate
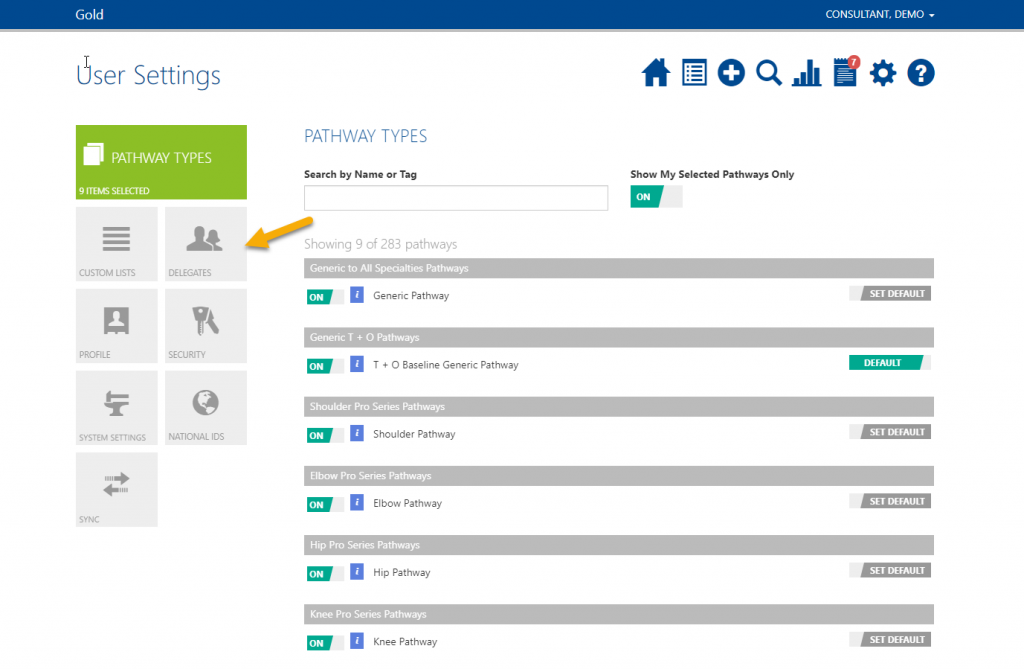
Delegates are able to enter and edit patient data on your behalf. They have access to your patient records and can update information under your name. The delegate needs to have their own Amplitude account to be able to do this, if not please contact Amplitude Customer Support directly to request a delegate account be set up. Please note: we need written confirmation from the consultant before creating the delegate account.
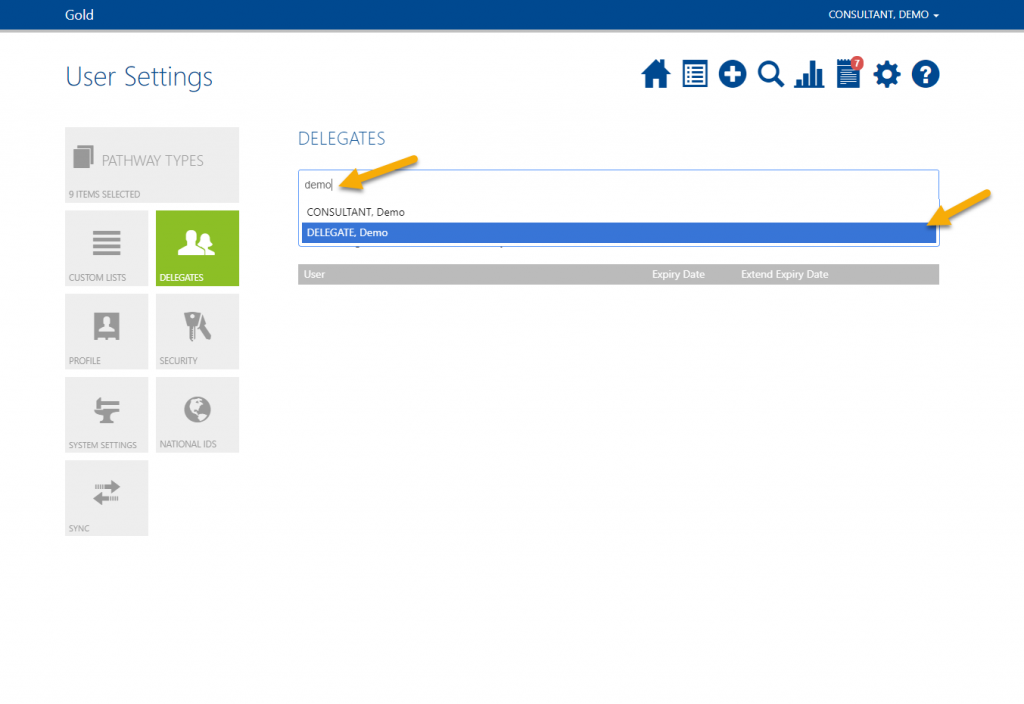
Start typing the name of the delegate into the search bar and select them from the list. If they do not appear please contact Amplitude Customer Support.
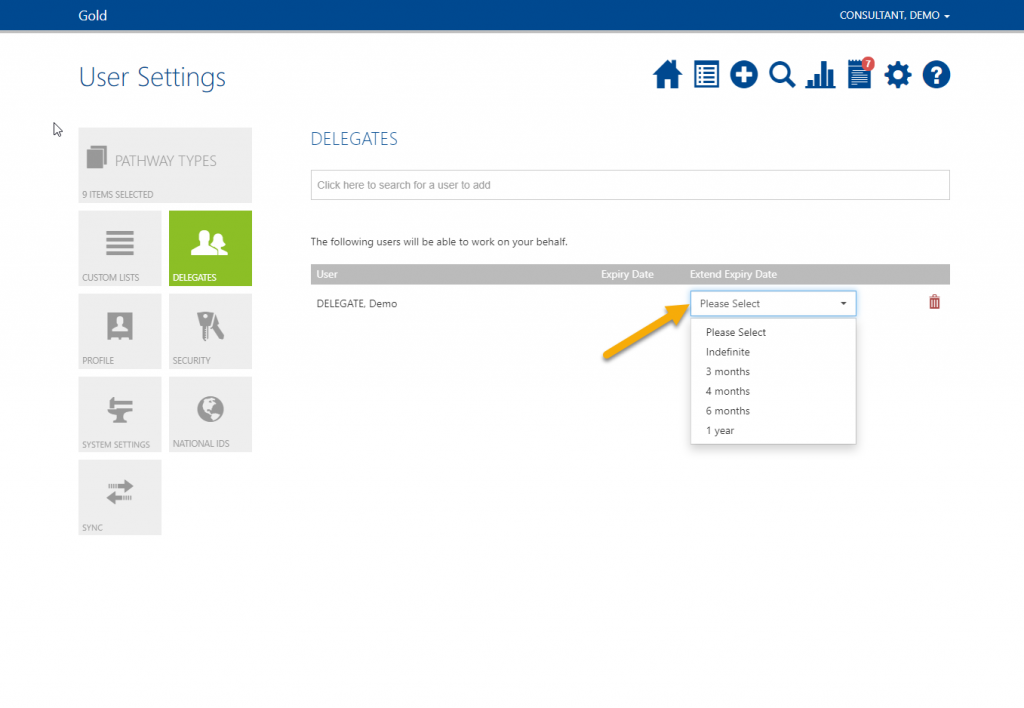
Your delegate has now been added.
On this screen you can also set an expiry date and delete any delegates.
How to Set Up Form Defaults
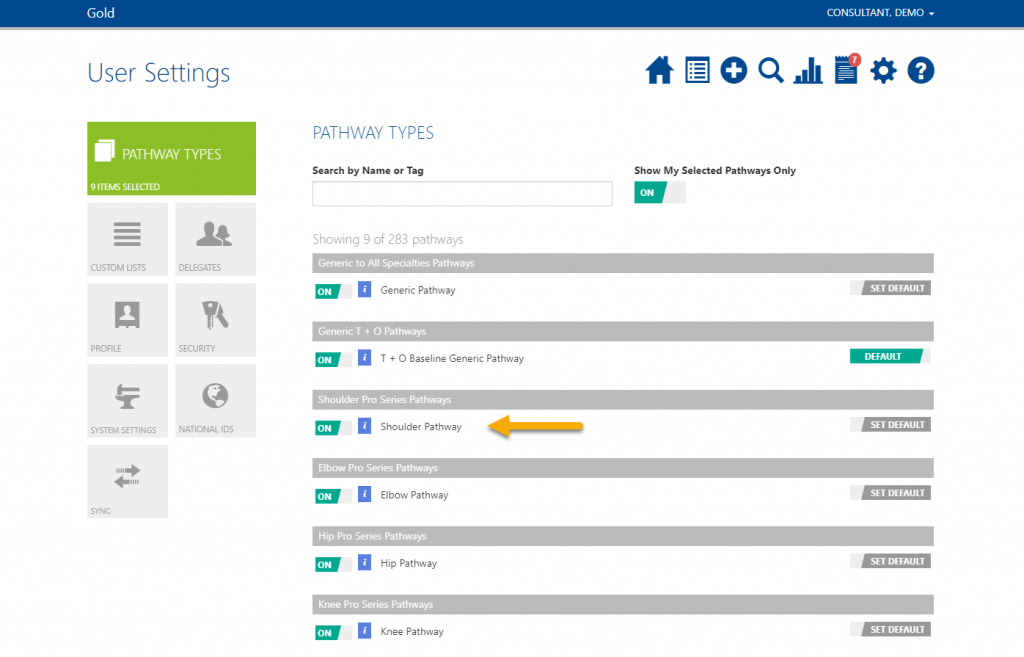
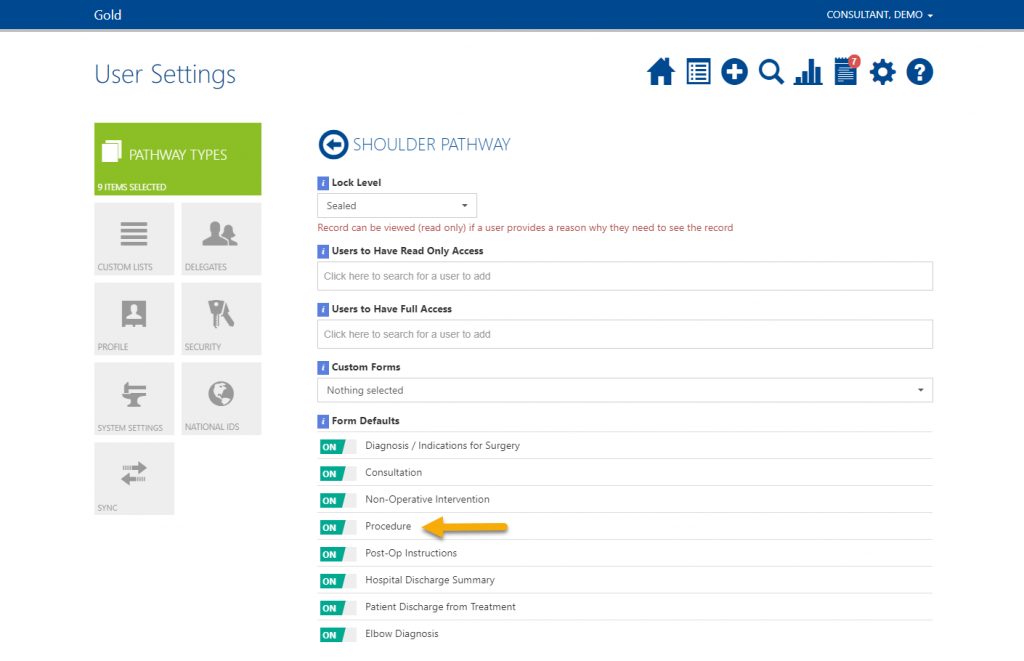
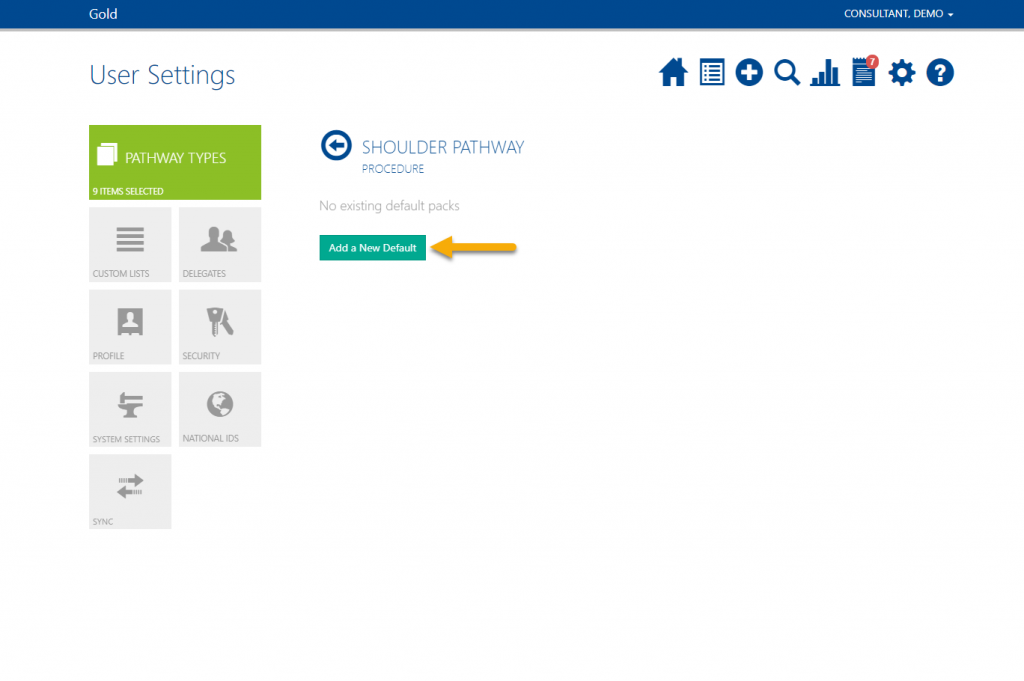
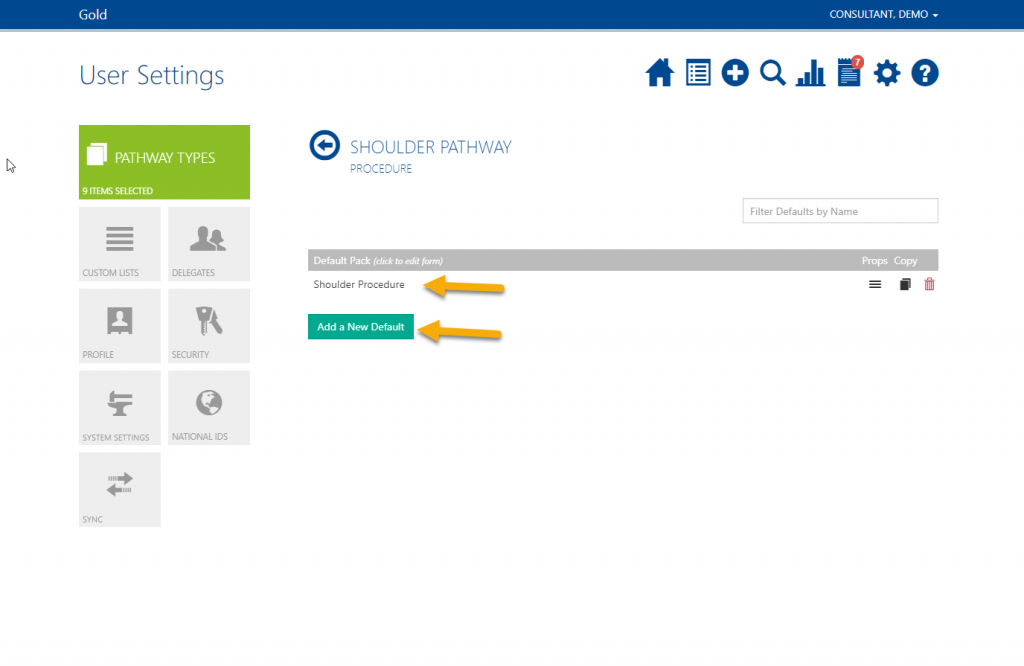
Having default forms can save time especially if you often perform the same procedure. If you create a form default you will always have the option to choose a blank form instead, you can also go back and edit the default when required.
Go through the form and pre-answer each question, these will be the defaults. When you have completed the form click Save.
This form can be edited by clicking the default’s name and you will always have the option of a blank form instead.
Choosing Your Pathways
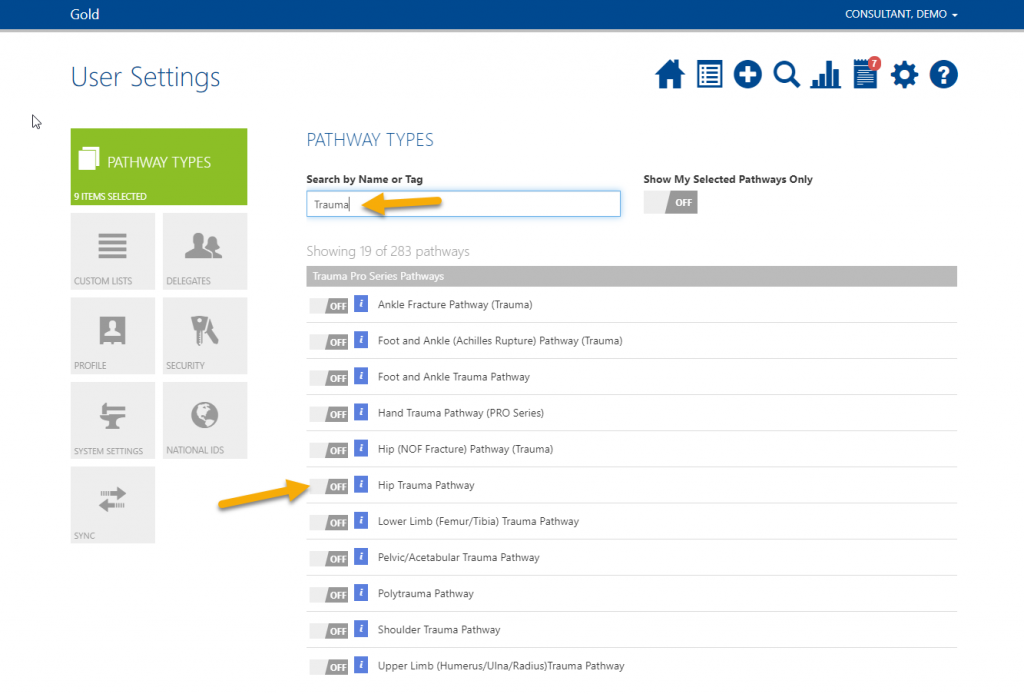
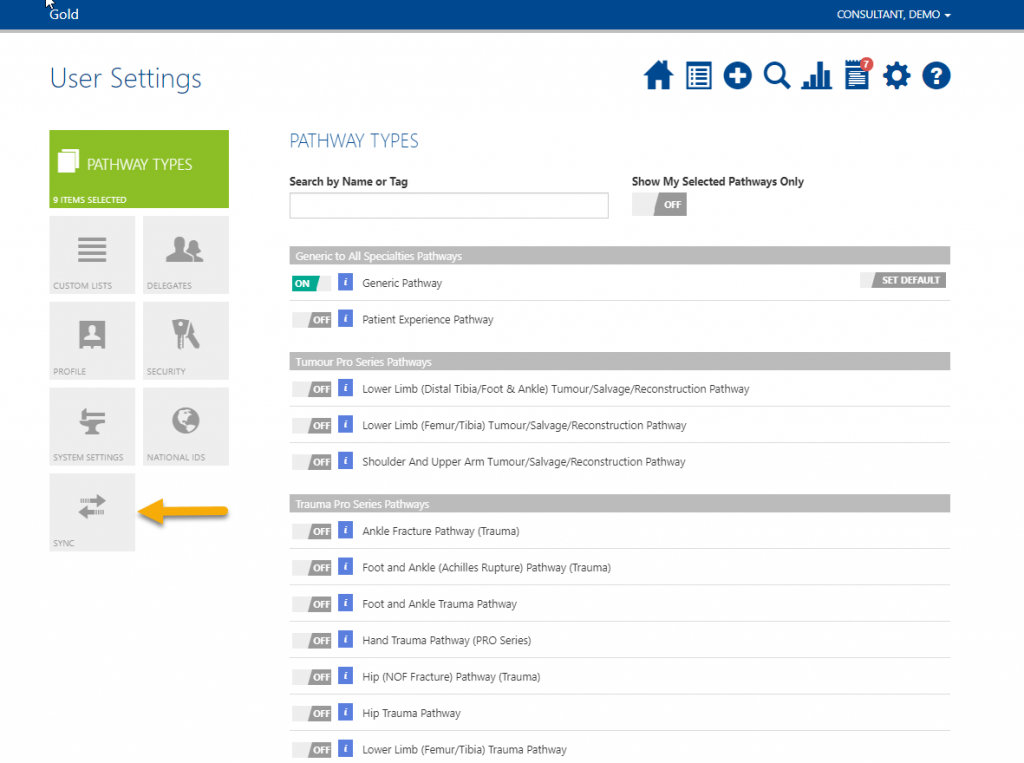
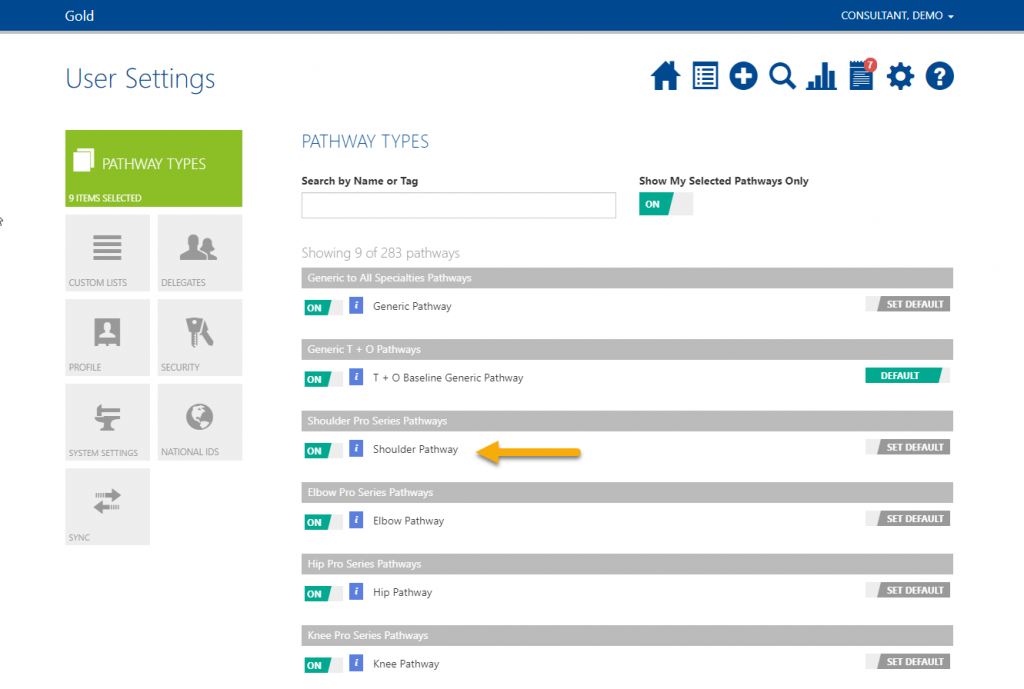
In order to put your patients on pathways you will first need to turn on the pathways you require. This is a one time setup which may already be done for you in Enterprise systems.
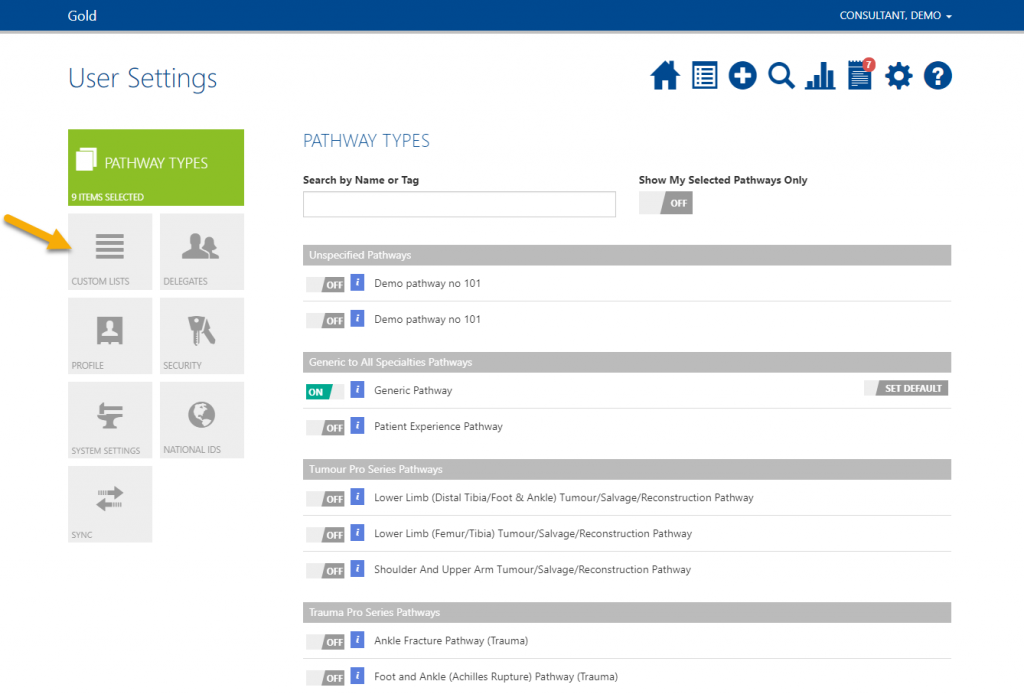
Use the drop-down list, search or scroll to find the pathways you require. Turn each pathway on by toggling OFF to ON.
You have the ability to select one pathway as a Default. This should be your most commonly used pathway and will appear at the top of the list when setting up a new patient.
How to Set up Custom Lists
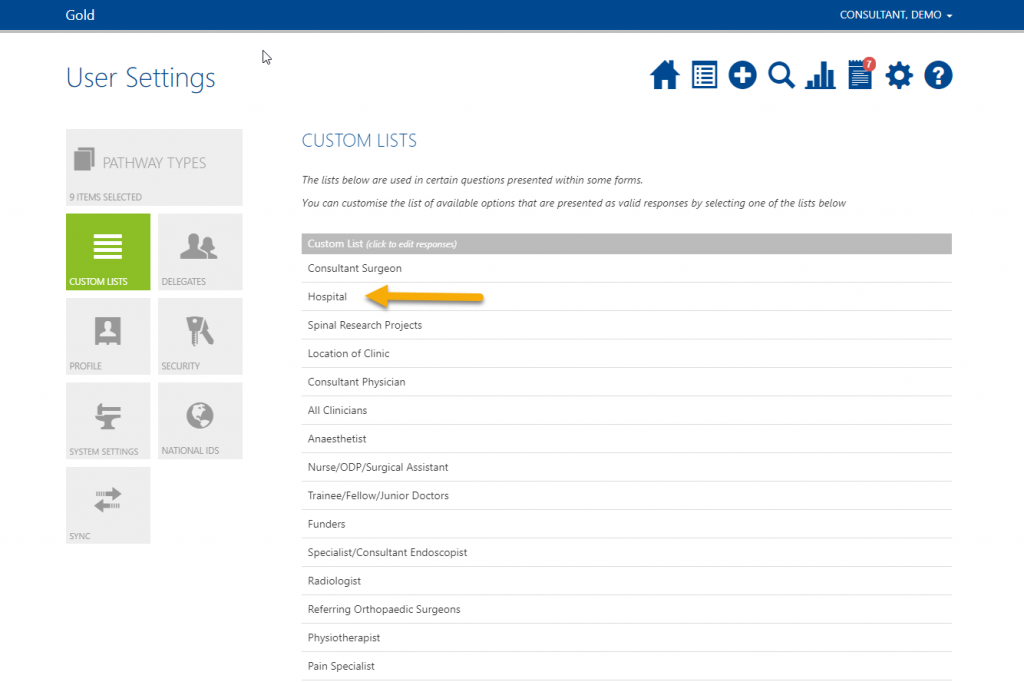
To complete procedure forms, Custom Lists first need to be set up. This is a one time setup which may already be done for you in Enterprise systems.
Click the items you would like to add to your profile, for example Hospital.
In most cases Consultant Surgeon, Hospital and Funders are mandatory procedure form fields.
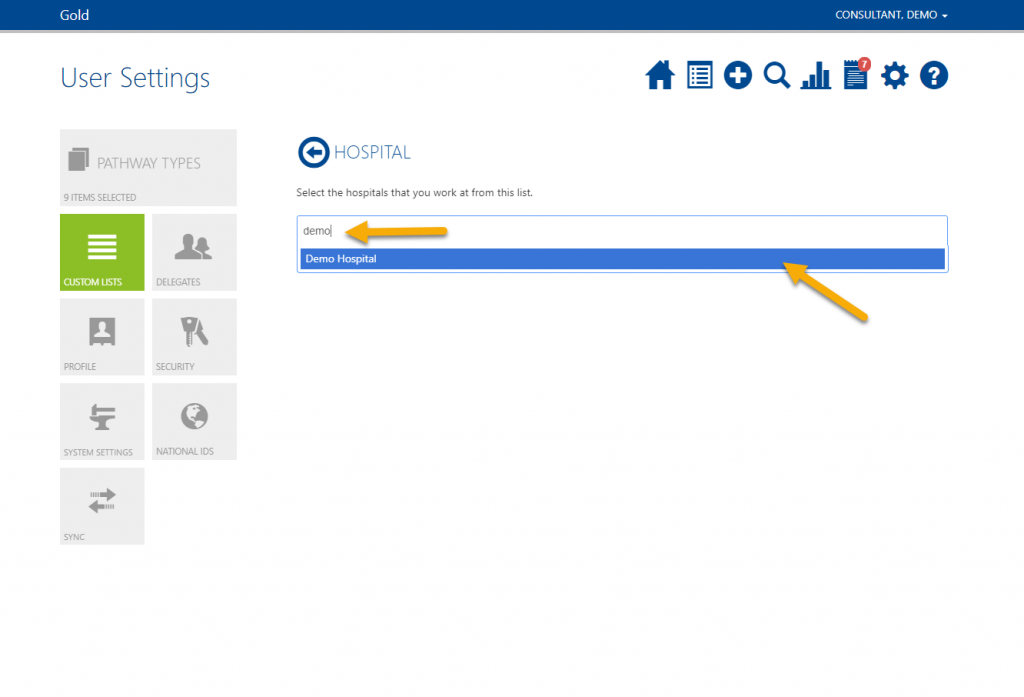
Search for the hospital you require and select it from the list.
If the hospital you require does not appear, please contact Amplitude Customer Support.
How to Use the Data Exchange
Only for pathway owners using a pro one™ or Enterprise system.
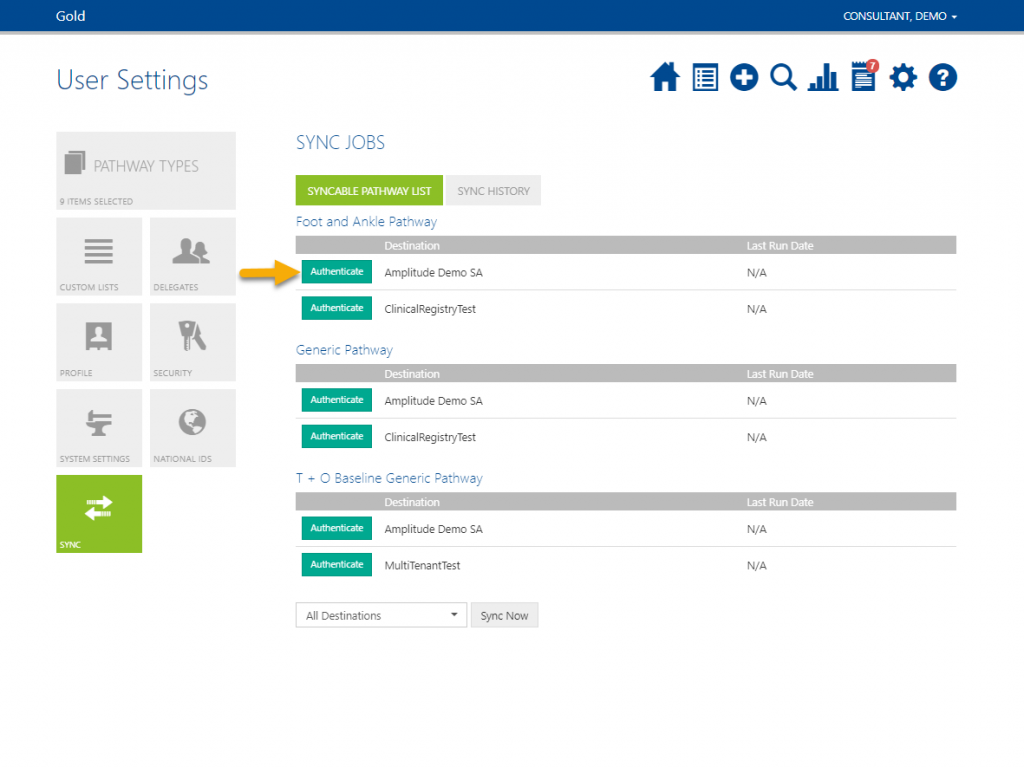
You will need to be set up as a user on both the source and destination sites with identical custom lists. These steps will need to be done only by consultants, delegates will not be able to do this.
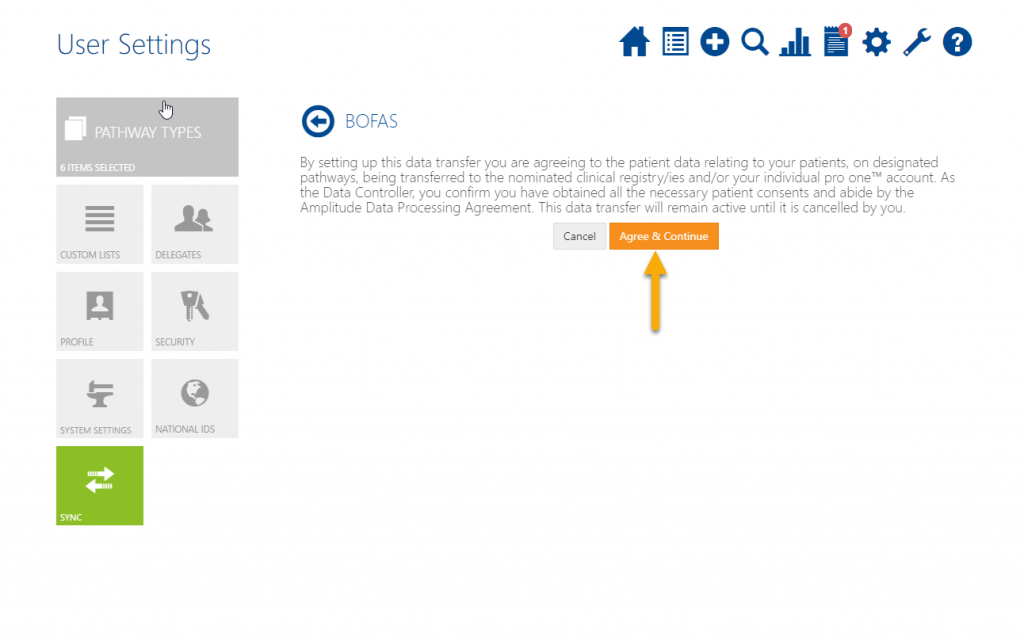
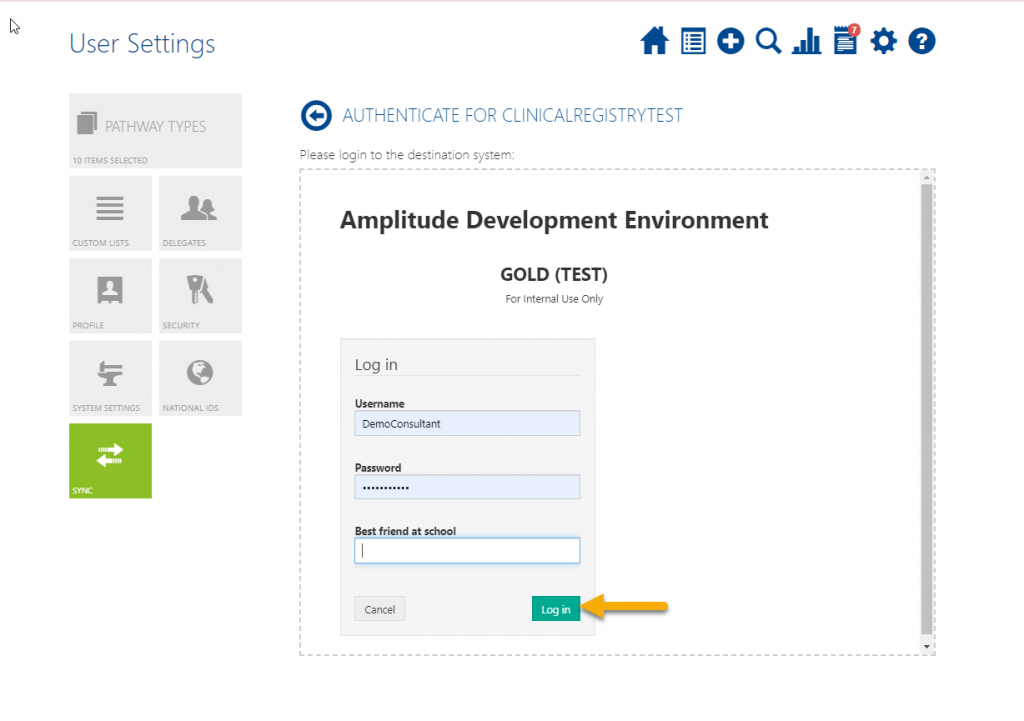
Click Authenticate for the site you would like to sync to. If you would like to sync to more than one site, please repeat this process for each site.
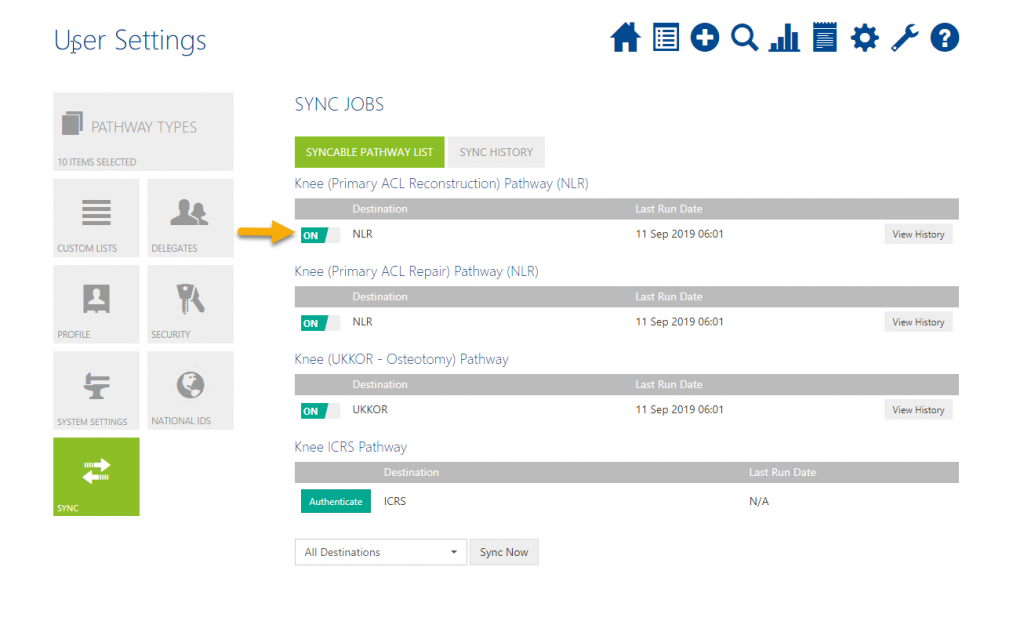
Switch on the pathways you would like to sync to that site.
The scheduler will now sync these pathways at the allotted time.
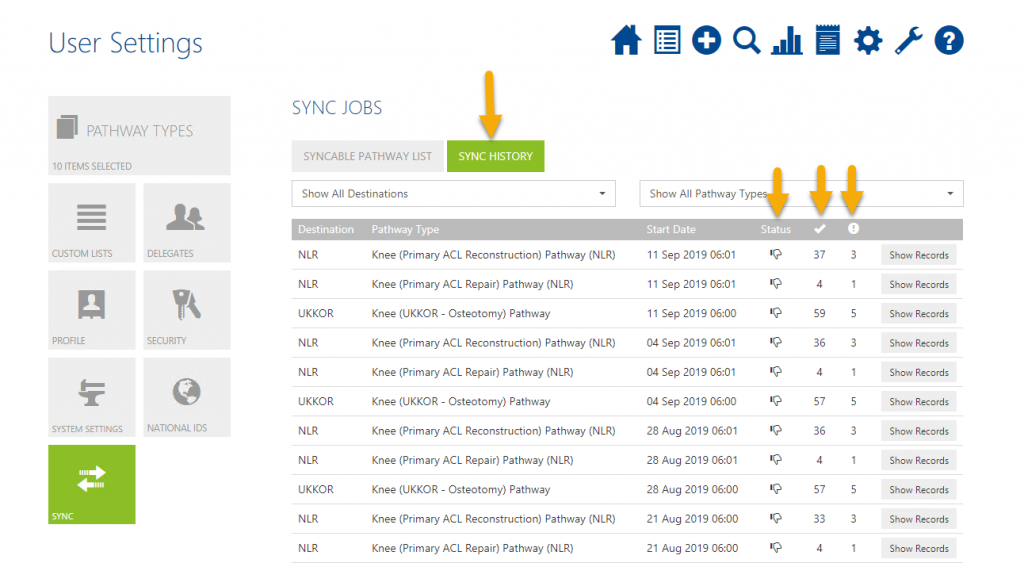
To check your data transfers click Sync History. Amplitude recommends checking the list regularly to make sure all data sync’s and patients are sending successfully.
You can choose the site and pathway to see the history of the sync task. Patients that fail to send appear in the ![]() column. Click ‘Show Records‘ to see who and why they failed to send. If you see an error with the data exchange please contact Amplitude Customer Support.
column. Click ‘Show Records‘ to see who and why they failed to send. If you see an error with the data exchange please contact Amplitude Customer Support.
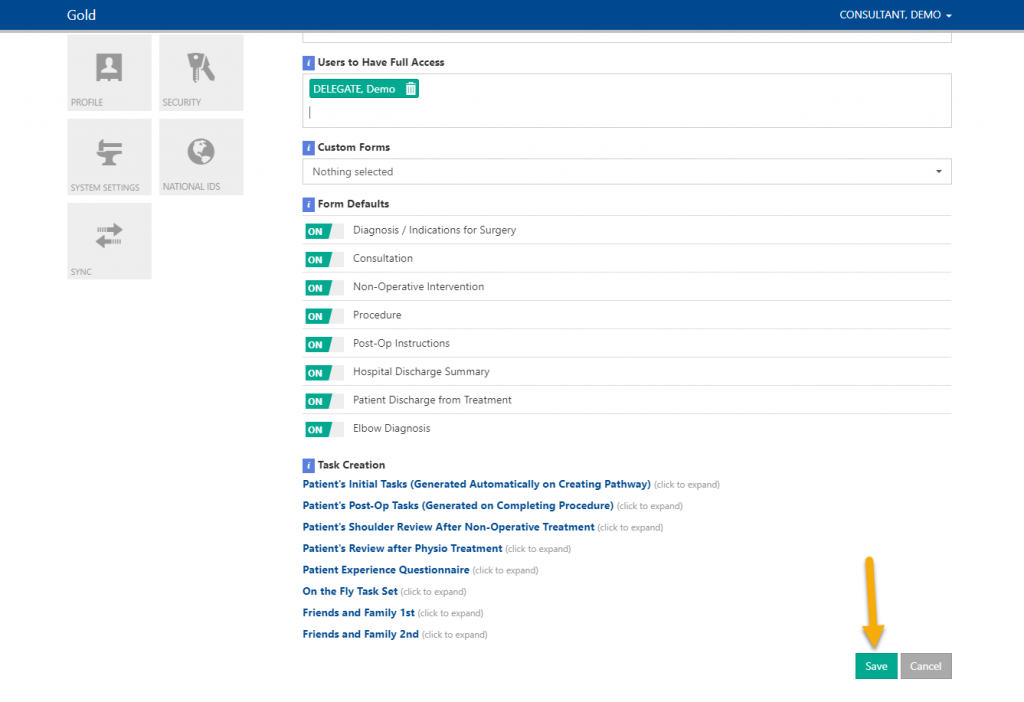
Granting Read Only or Full Access
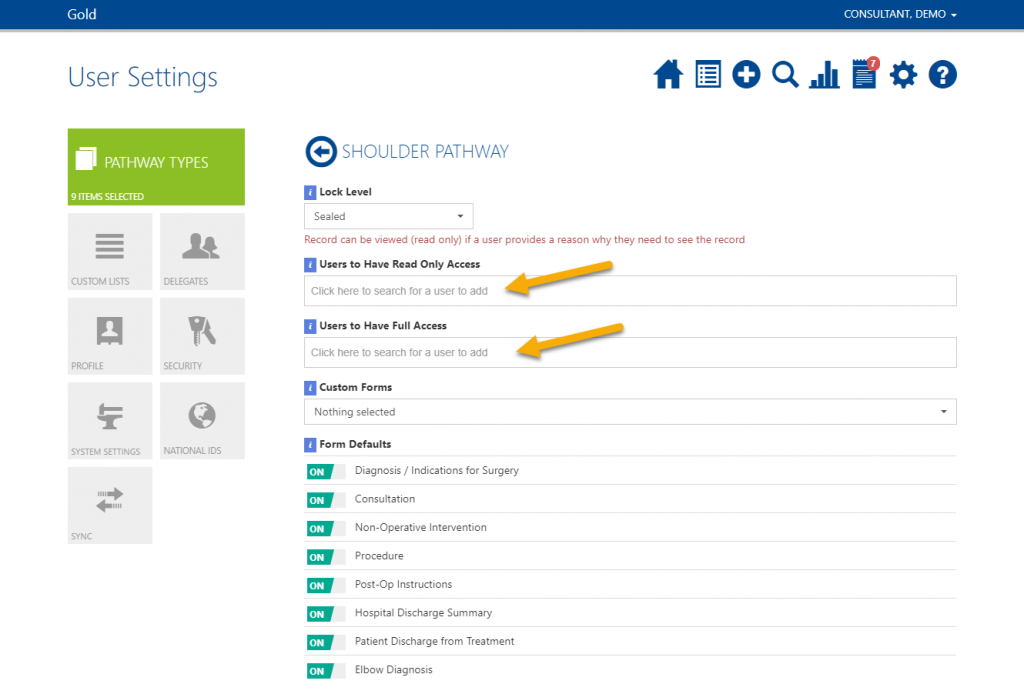
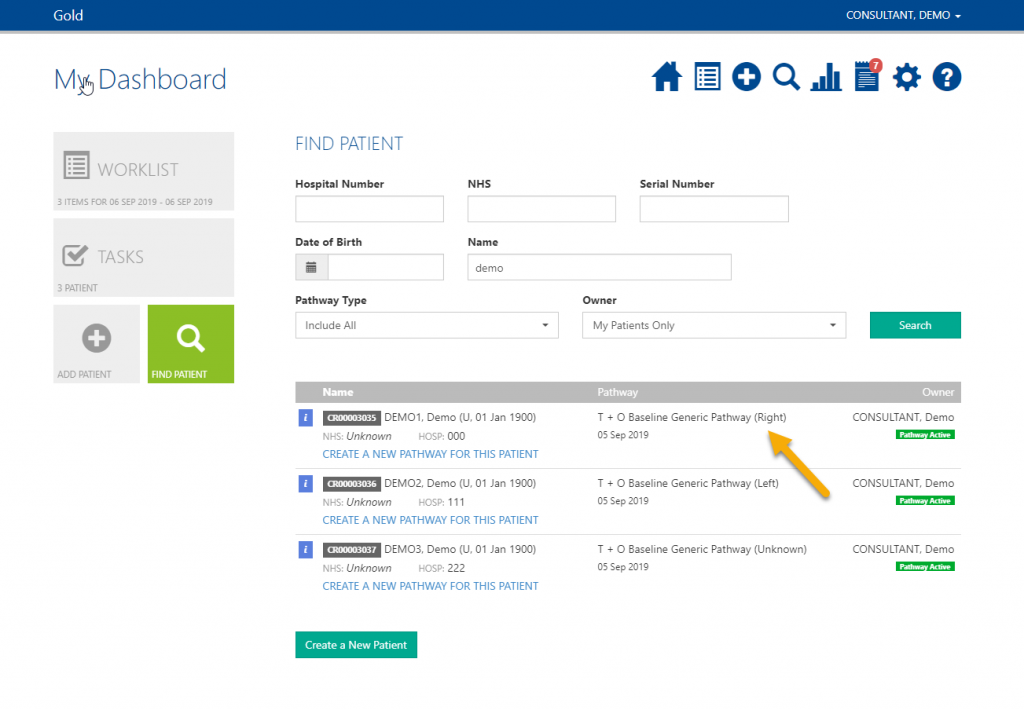
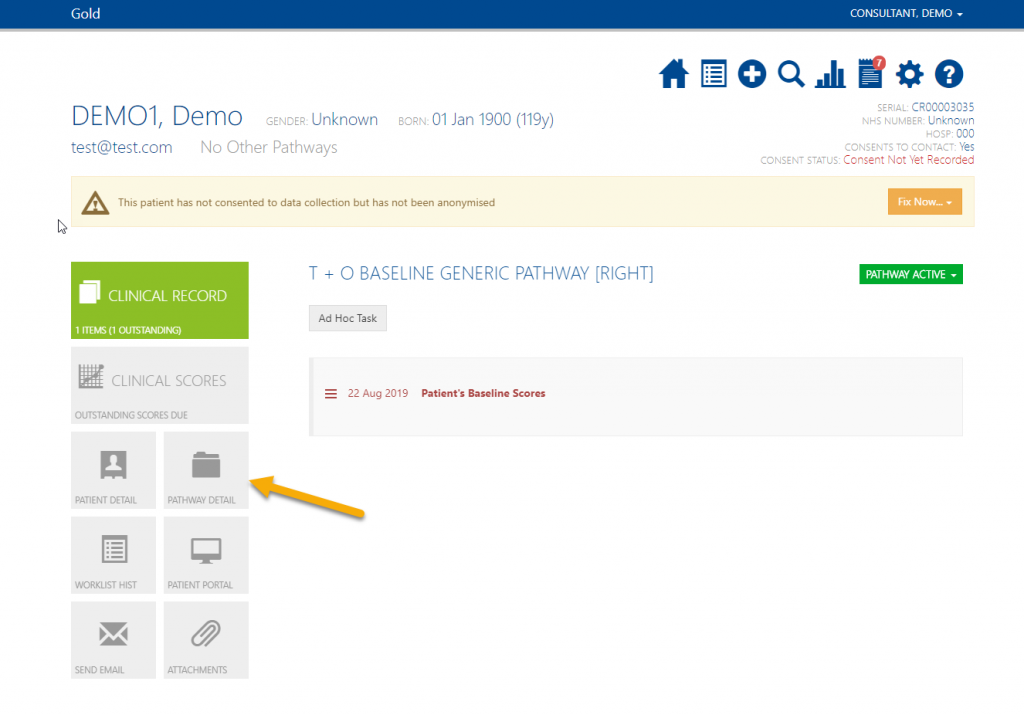
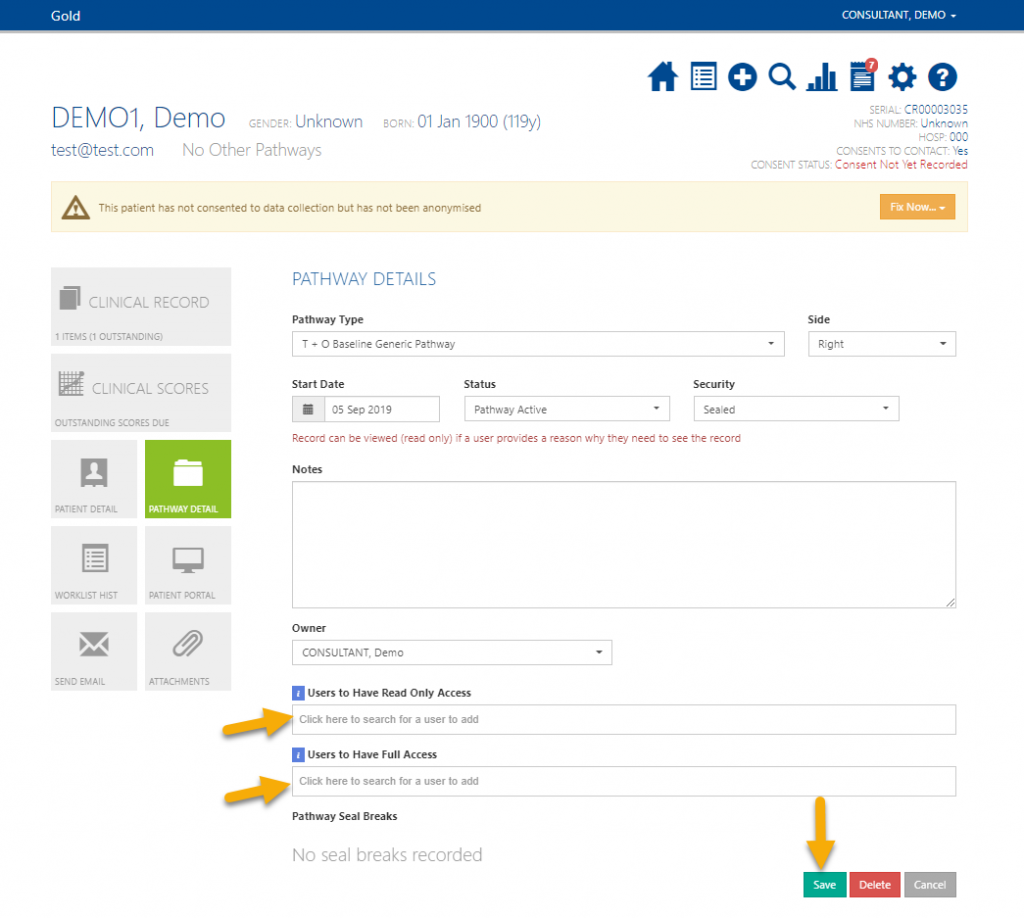
Users can have Read Only or Full Access to your patients either on a pathway level or for individual patients.
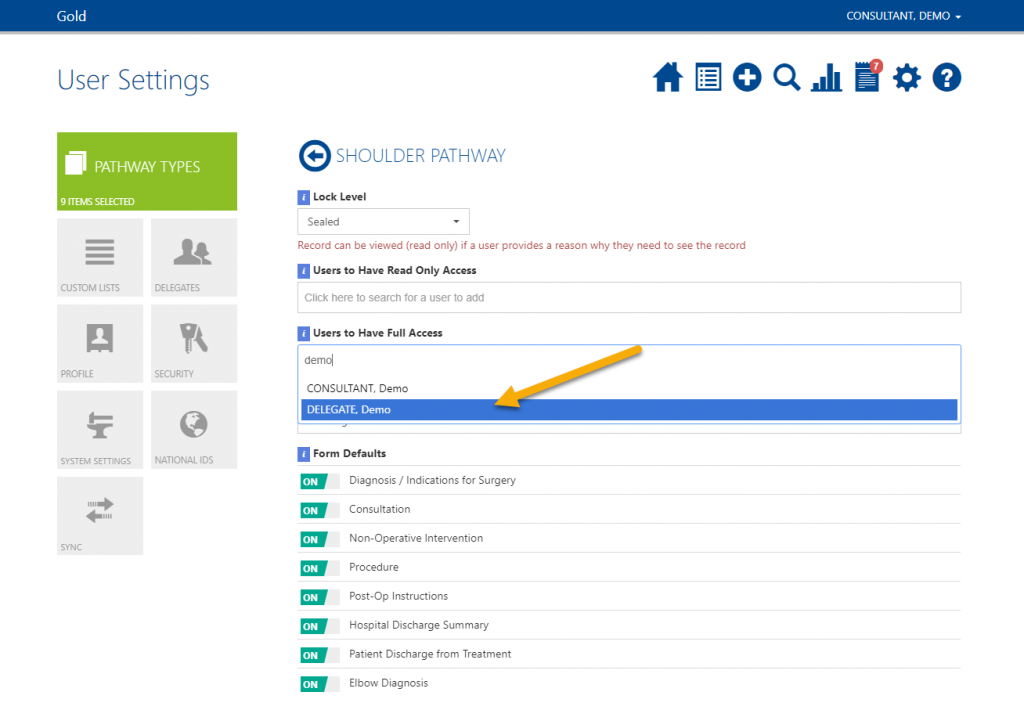
Start typing the users name into the search bar, click their name when it appears.
Repeat this for all users you wish to have access.
Click in either ‘Users to Have Read Only Access’ or ‘Users to Have Full Access’.
Start typing the users name into the search bar, click their name when it appears.
At the bottom of the page click Save.

